Last updated October 31, 2026
 Water damage drying
 Fire & smoke cleanup
 Mold remediation
 Storm response
 Sewage cleanup
 Reconstruction
Free visual inspection and a written scope of work before any mitigation begins - photos, moisture readings, and drying logs go in your claim file
The scope we write is the scope we bill. Anything new gets shown to you, in writing, before we touch it.
Get your free estimateDIY vs Professional Damage Restoration: The Corona Homeowner’s Decision Guide
Here’s a truth most restoration guides won’t tell you: the difference between a successful DIY water mitigation and a denied insurance claim often has nothing to do with how hard you worked. It comes down to a moisture log, a thermal imaging report, and a third-party credential a homeowner simply cannot generate on their own. In Corona, where summer heat accelerates mold growth in wet drywall and the Santa Ana winds turn small smoke odor into a house-wide problem in 48 hours, the stakes are higher than most residents realize. This guide draws the actual line between what you can handle yourself, what you shouldn’t touch, and the hybrid approach that protects both your property and your claim.
Quick Answer
DIY damage restoration is defensible in Corona for small, clean-water spills under roughly 10 square feet, minor cosmetic smoke cleanup on hard surfaces, and isolated efflorescence treatment, provided you document everything and dry thoroughly within 48 hours. Professional restoration is mandatory for Category 2 or 3 water damage, any water intrusion involving wall cavities or subfloor assemblies, post-fire structural cleaning, and any mold growth exceeding 10 square feet. The deciding factor isn’t effort; it’s whether you can produce the documentation an insurance adjuster will require and whether California law restricts the work to licensed contractors.
Restoration work we handle
Table of Contents
- The California Legal Line: What State Law Says About DIY Restoration
- The Four Damage Scenarios Where DIY Is Defensible in Corona
- When DIY Fails: The Damage Types That Demand Professional Equipment
- The Insurance Documentation Problem: What a Claim Actually Requires
- Equipment Reality Check: Consumer-Grade vs. Commercial-Grade Drying
- The Hybrid Approach: Handling Initial Mitigation While Professionals Mobilize
- Corona-Specific Factors That Change the DIY Calculus
- Step-by-Step: How to Hand Off Properly When You’ve Started Yourself
The California Legal Line: What State Law Says About DIY Restoration
California’s Contractors State License Board (CSLB) draws a bright line that most homeowners never see until it’s too late. Any construction, alteration, or repair work valued at $500 or more, including labor and materials, requires a state-licensed contractor. Structural drying that involves cutting into walls, removing baseboards, or accessing subfloor cavities crosses that threshold quickly. In Corona, where many homes were built during the 1990s and early 2000s housing boom, hidden water damage often lurks behind stucco exteriors and inside wall cavities where the CSLB rule applies most aggressively.
Here’s what this means in practical terms. You can rent a dehumidifier and dry a visible puddle on your tile floor. But the moment you start pulling wet drywall in a Corona home, you’re performing work that arguably requires a contractor’s license if the value exceeds $500. Now consider that a single wet wall cavity on an exterior stucco wall often requires removing and replacing 30 to 50 square feet of drywall, insulation, and vapor barrier. You’re past the CSLB threshold before you’ve finished cutting the first hole.
The liability goes deeper than licensing. If you sell a Corona home within three years of a DIY structural repair and the buyer discovers concealed water damage you didn’t properly remediate, California’s real estate disclosure requirements put you in an uncomfortable position. A professional restoration company generates documentation that follows the property. A DIY effort generates a memory and maybe some phone photos.
We’re not saying this to scare you into hiring us. We’re saying it because Corona homeowners deserve to understand the legal landscape before making a decision. The CSLB rules exist because improperly performed structural work creates secondary damage, mold liability, and unsafe living conditions. The law is on your side when you work with credentialed professionals; it’s a liability when you don’t.
For water damage that hits the legal threshold, our Water Damage Restoration in Fallbrook approach applies the same IICRC-certified protocols we use throughout the region, including Corona.
The Four Damage Scenarios Where DIY Is Defensible in Corona
Not every damage event requires a restoration crew. In fact, calling a company for trivial issues wastes your time and money, and any honest restoration professional will tell you the same. Here are the four scenarios where DIY is both legally and practically defensible for Corona homeowners.
1. Small Surface-Area Water Spills on Non-Porous Surfaces
A spilled pitcher of water on a tile floor. A minor sink overflow contained to the bathroom’s tile. A leaking water heater that pooled onto the garage’s concrete slab. If the water is Category 1 (clean, from a sanitary source), the affected area is under roughly 10 square feet, and no porous materials are saturated, you can handle this yourself. Use towels and a wet/dry vacuum to extract what you can, then run a household fan and dehumidifier for 24 to 48 hours. The key is confirming dryness, not just visible dryness. A $30 moisture meter from a hardware store will tell you whether the surface is actually dry or just looks dry.
2. Minor Smoke Odor on Hard Surfaces
After a small kitchen fire or a burnt pan that filled the house with smoke, hard surfaces like countertops, tile, and sealed wood floors can be cleaned with a degreasing cleaner and a white vinegar solution. This applies only when the smoke odor is the result of a single contained event, not a structural fire. In Corona’s dry climate, smoke particles settle quickly, making surface cleanup more effective than in humid regions where particles bond with moisture in the air.
3. Isolated Efflorescence Treatment
Efflorescence, the white chalky deposit that appears on concrete or masonry when water evaporates and leaves behind mineral salts, is common in Corona garages and foundation walls. If you’ve confirmed the underlying water intrusion is fixed and the efflorescence is limited to a small area, brushing it off with a stiff brush and applying a masonry sealer is a reasonable DIY project. This is cosmetic, not structural. However, recurring efflorescence in a new location is a warning sign that water is still moving through the material, and that’s a professional assessment.
4. Cosmetic Fire Cleanup on Non-Porous Surfaces
After a minor fire that didn’t involve structural damage, cleaning soot from hard, non-porous surfaces like glass, metal, and sealed tile is something a Corona homeowner can do with a dry sponge and specialized soot cleaner available at local hardware stores. The key what makes this defensible: the absence of water damage from firefighting efforts. Once water enters the equation, you’re combining fire damage with water intrusion, and that’s a different category entirely.
The common thread across all four scenarios is limited surface area, non-porous materials, and Category 1 water only. The moment any one of those variables changes, the calculus shifts.
When DIY Fails: The Damage Types That Demand Professional Equipment
Certain damage types in Corona are simply beyond the reach of homeowner-grade intervention. This isn’t about effort or willingness; it’s about physics, chemistry, and equipment capacity. Here are the scenarios where DIY approaches consistently fail, and why.
Category 2 and Category 3 Water Damage
Category 2 water, sometimes called “gray water,” contains significant contamination. It comes from washing machine overflows, dishwasher discharge, or sump pump failures. Category 3 water, “black water,” is grossly contaminated and includes sewage, floodwater from rivers or streams, and standing water that has begun growing bacteria. In both categories, the water isn’t just wet; it’s carrying pathogens and organic matter into porous materials. Consumer-grade extraction and drying cannot remove this contamination. The affected materials need either professional disinfection or removal and replacement by a certified team following IICRC standards.
Water Inside Wall Cavities, Ceilings, or Subfloor Assemblies
Corona homes built with stucco exteriors present a particular challenge. When water gets behind stucco, it doesn’t evaporate quickly in the dry Corona air like it would on an interior wall. It sits there, trapped between the stucco and the framing, feeding mold growth that remains invisible for weeks. We’ve seen this repeatedly in neighborhoods like Eagle Glen and Sierra del Oro, where water intrusion from stucco cracks or window flashing failures creates concealed damage that only reveals itself as a musty odor or bubbling paint months later. Professional structural drying equipment, including Injectidry systems that push dry air into wall cavities under controlled pressure, addresses this. A box fan pointed at the baseboard does not.
Mold Growth Exceeding 10 Square Feet
The EPA’s guidance on mold is clear: any growth covering more than about 10 square feet requires professional remediation. But even smaller patches matter if they’re in HVAC ductwork, behind walls, or associated with a moisture source you can’t identify. In Corona’s climate, mold doesn’t need constant humidity to survive; it needs the intermittent moisture from leaks and condensation that our temperature swings create. Our Mold Remediation in Fallbrook process includes containment, air filtration, and clearance testing that a DIY approach simply cannot replicate.
Post-Fire Structural Cleaning and Odor Removal
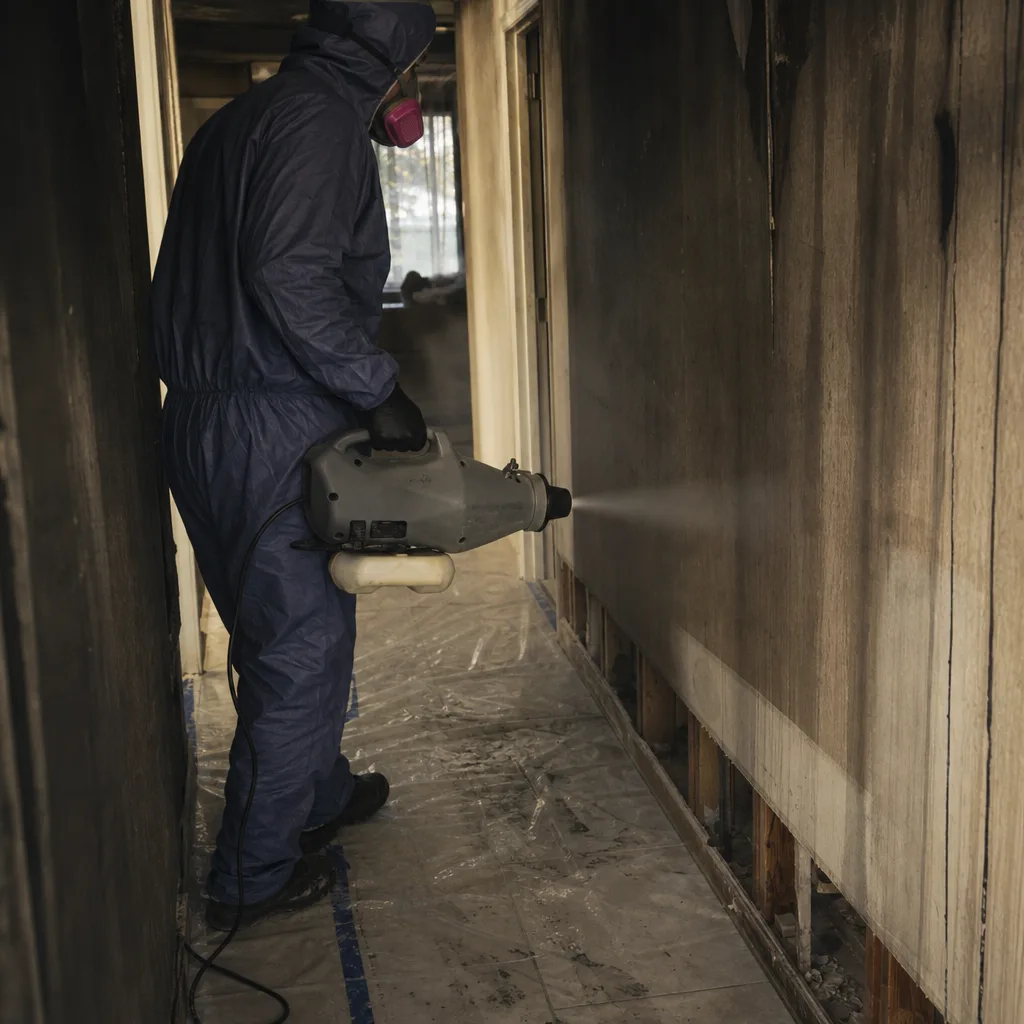
After a structural fire, smoke odor penetrates every porous surface: drywall, insulation, wood framing, carpet, upholstery. Even with extensive surface cleaning, the odor returns because the smoke particles are trapped inside materials. Professional fire restoration requires thermal fogging, ozone treatment, and in many cases, disposal and replacement of charred structural components. In Corona’s older neighborhoods near downtown, where homes may have original framing from the 1950s and 1960s, this work requires careful assessment of what can be saved versus what must be replaced. Our Fire Damage Restoration in Fallbrook team handles this process with the same documented protocols we use for every fire job in the region.
For the full cascade of fire damage, from initial soot removal to final rebuild, having a single certified team handle OC Restoration Co home services eliminates coordination gaps between multiple specialty contractors.
The Insurance Documentation Problem: What a Claim Actually Requires
Here’s the scenario we lead with, because it happens more often than any restoration company wants to admit. A Corona homeowner experiences a slow dishwasher leak under the kitchen cabinets. They notice the water, pull up the flooring, dry the area with towels and a small dehumidifier, and move on. Three months later, they smell mustiness, pull back a cabinet toe kick, and find mold spreading across the subfloor. They file an insurance claim for mold remediation and the adjuster asks for documentation. The homeowner has before-and-after phone photos and a receipt from Home Depot for cleaning supplies. The claim is denied.
Why? Because the homeowner can’t prove the initial drying was completed to industry standard. The adjuster has no evidence that the moisture content of the subfloor was measured, that the drying target was reached, or that the area was monitored over time. The homeowner might have done everything right. But in the insurance world, unverifiable is indistinguishable from unperformed.
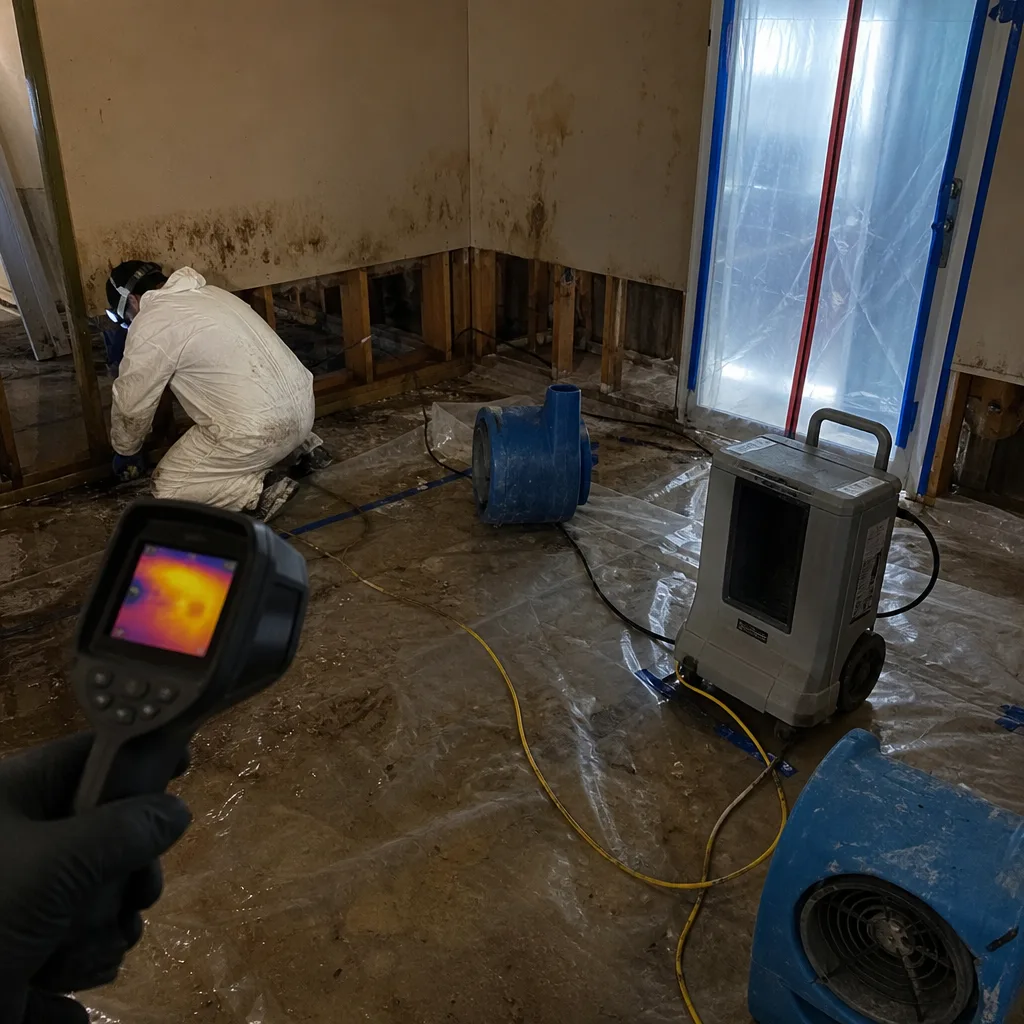
Professional restoration companies generate a documentation package that withstands adjuster scrutiny. It typically includes:
- Initial moisture readings: measurements from moisture meters at multiple points, establishing the damage scope at arrival.
- Thermal imaging reports: infrared camera images showing the full extent of water migration, including into areas not visible to the naked eye.
- Drying logs: daily readings of moisture content, temperature, and relative humidity, demonstrating that the drying curve progressed to a specific, defensible endpoint.
- Equipment records: documentation of what equipment was placed, where, and for how long, including daily operational checks.
- Clearance testing: post-remediation air quality samples confirming spore counts returned to normal background levels.
- Photo documentation: before, during, and after images at every stage, time-stamped and organized for adjuster review.
None of this is proprietary magic. It’s standard industry practice defined by the IICRC S500 standard for water damage restoration. But it requires equipment that costs thousands of dollars and training that takes weeks. A Corona homeowner cannot generate these documents any more than they can generate their own lab results for a medical claim.
We’re members of the Restoration Industry Association and affiliated with the IFA. These memberships mean something specific: we follow documented standards that insurance carriers recognize. When you’re mid-claim and the adjuster asks for proof, that credibility matters.
Equipment Reality Check: Consumer-Grade vs. Commercial-Grade Drying
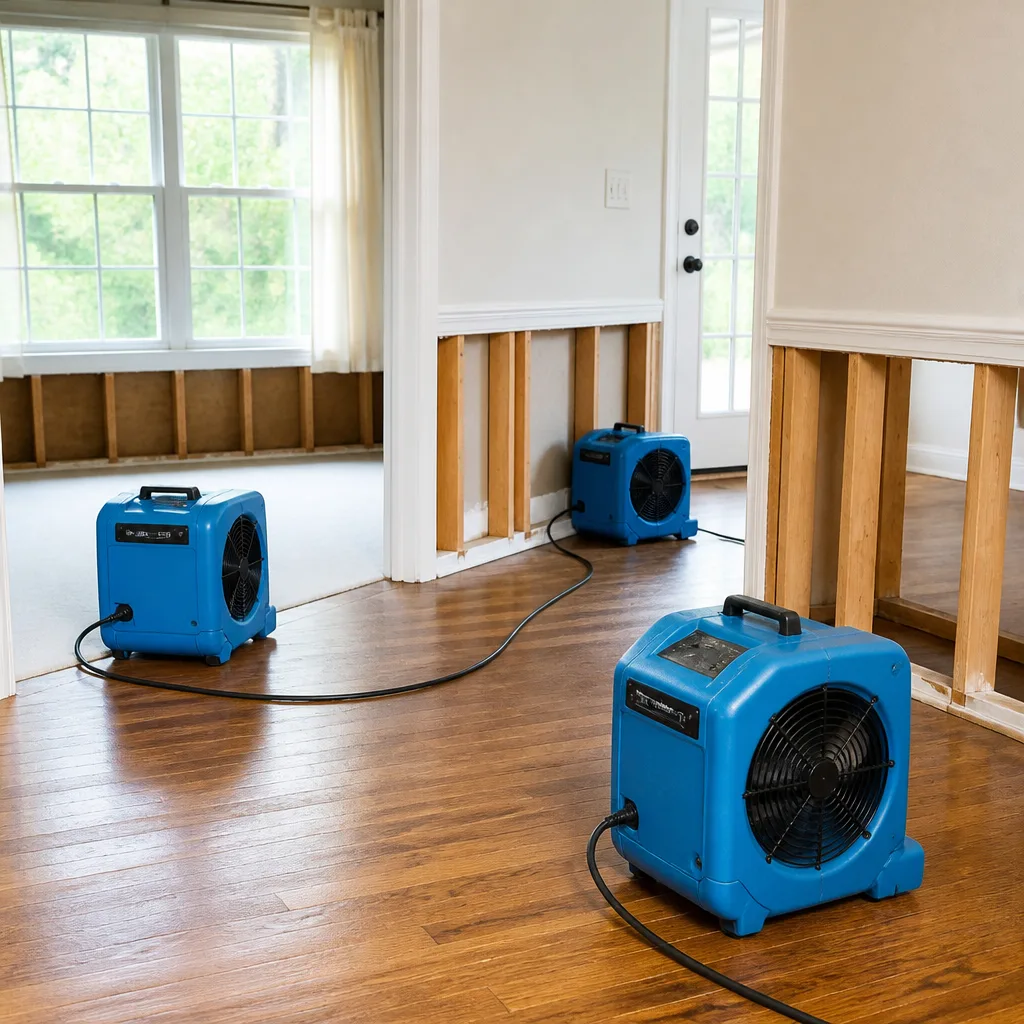
Let’s put actual numbers behind the equipment gap, because the difference isn’t subtle. A standard consumer dehumidifier, the kind you buy at a big-box store for $200, removes roughly 20 to 30 pints of water per day under optimal conditions (80°F, 60% relative humidity). A commercial low-grain refrigerant (LGR) dehumidifier, like a Dri-Eaz or Phoenix unit, removes 130 to 225 pints per day under the same conditions. That’s not double or triple; that’s a seven-to-tenfold difference in water removal capacity.
Then add the air movement. A household box fan moves about 2,000 to 3,000 cubic feet per minute (CFM) of air at close range, with airflow that drops off dramatically with distance. A commercial air mover from XPOWER or B-Air moves 2,800 to 4,000 CFM, but directs that airflow into a focused, low-profile stream that forces air across wet surfaces and into tight spaces. In a Corona home where water has migrated under baseboards and into wall cavities, that directed airflow is the difference between drying and hiding.
The drying physics also work against the DIY approach. Water in porous materials like drywall, wood, and concrete doesn’t evaporate at a constant rate; it follows a drying curve that slows as moisture content drops. The final 10% of moisture takes proportionally longer to remove than the first 50%. Consumer equipment simply doesn’t have the capacity to push through that drying curve in the 48-hour window before mold colonization begins. In Corona’s summer heat, where interior temperatures regularly exceed 85°F in unconditioned spaces, the mold growth window shrinks even further.
For water in wall cavities, the commercial approach uses Injectidry systems that create negative air pressure inside the cavity, pulling dry air through the wall assembly and extracting moisture that would otherwise stay trapped for weeks. There is no consumer analog to this. You cannot rent an Injectidry system at a hardware store; these are professional tools operated by certified technicians.
One more point on the equipment reality: the cost of renting professional-grade equipment yourself, if you could find it for rent, often approaches the cost of hiring a professional for the mitigation phase. And when you rent, you don’t get the training to deploy the equipment correctly or the documentation to prove it worked. The economics of DIY professional-grade drying don’t favor the homeowner.
The Hybrid Approach: Handling Initial Mitigation While Professionals Mobilize
There’s a middle path, and for many Corona homeowners, it’s the smartest one. You can handle the immediate, critical steps while a professional team is being contacted and dispatched. This approach lets you start the mitigation clock immediately, while ensuring the documentation and heavy lifting are handled by credentialed professionals.
Here’s what makes sense for a homeowner to do in the first hour, regardless of the damage type:
- Stop the water source. Shut off the water supply at the fixture or the main valve. For Corona homes with older supply lines in neighborhoods like Horsethief Canyon, locate the main shutoff before you need it.
- Kill the electricity to affected areas. Water and electricity don’t mix. If water is near outlets, switches, or appliances, shut off the breakers to those circuits. This is a safety measure, not a restoration step.
- Move undamaged belongings out of the affected area. Furniture, rugs, electronics, and personal items should be relocated to dry areas. This prevents secondary damage and gives the restoration team clear access.
- Document the scene. Take photos and video of everything before you move a single wet item. These photos are useful to the restoration team and potentially useful to your insurer.
- Call a certified restoration company. This is the point where DIY ends and professional documentation begins. The sooner the call happens, the sooner drying starts and the stronger your position becomes.
The key to the hybrid approach is knowing where your authority ends. You can extract standing water you can see. You cannot measure moisture in wall cavities. You can photograph visible damage. You cannot generate the thermal imaging report that shows what’s behind the drywall. The handoff is where coroners, not where liability begins, so you get the right result when you get it right.
Corona-Specific Factors That Change the DIY Calculus
Every city has its own damage profile, and Corona’s particular combination of climate, geology, and housing stock creates specific considerations that a generic DIY guide won’t tell you about.
The Inland Empire heat accelerates evaporation, but not always helpfully. Corona’s summer temperatures routinely reach 95°F and above. In an unconditioned interior space during a water event, that heat means mold colonization begins faster than in coastal cities like Newport Beach or Huntington Beach. The 48-hour mold window that applies nationally becomes a 36-hour window in a Corona home in August. DIY drying efforts that might work in a cooler climate simply don’t have the buffer time they need here.
Stucco exteriors trap moisture differently than siding. The majority of Corona homes built since the 1990s use stucco exterior cladding. Stucco is porous and absorbs water, but it dries slowly and can hold moisture against the framing for extended periods. When water penetrates behind stucco, whether through a crack, a failed window flashing, or a roof leak, it creates a micro-environment that is exactly what mold needs. Surface-level DIY drying cannot address this.
Hard water affects drying and cleaning. Corona sits on groundwater with high mineral content. When water evaporates, it leaves behind mineral deposits that can affect surfaces differently than in soft-water communities. Hard water residue on tile, glass, and fixtures requires acid-based cleaning that many homeowners don’t expect. More importantly, mineral deposits can affect the performance of drying equipment and leave visible evidence of water damage long after moisture is removed.
Santa Ana winds complicate smoke damage. During Santa Ana wind events, which occur most frequently in the fall, smoke from wildfires can infiltrate Corona homes for days at a time. This is different from a single fire event. Repeated smoke exposure over multiple days means smoke particles settle deeper into porous materials, and they’re joined by fine ash and dust blown in from the winds. DIY smoke cleanup that works for a single event rarely addresses the accumulated contamination from a sustained wind-driven exposure.
Older housing stock near downtown Corona presents unique challenges. Homes built before the 1980s often have plaster walls, different framing techniques, and materials that respond differently to both water and fire damage. In neighborhoods like the areas around Main Street and the historic downtown district, restoration decisions require more nuanced assessment than in the newer tract developments.
Step-by-Step: How to Hand Off Properly When You’ve Started Yourself
If you’ve already begun mitigation on your own, whether that means mopping up water, opening windows, or moving furniture, here’s how to hand off to a professional team without compromising your situation.
- Stop where you are. If you’ve been drying for more than a day and the area still feels damp or smells musty, the situation is moving backward, not forward. Additional DIY effort won’t reverse the trend.
- Document what you’ve done. Write down what day you discovered the damage, what steps you took, what equipment you used, and for how long. Be specific. This isn’t just for the restoration company; it’s potentially useful for your insurance claim.
- Call a certified restoration company and describe the situation honestly. Tell them what happened, what you’ve done, and what you’re seeing now. Honest information allows the team to bring the right equipment on the first visit, which saves time and money. Call (833) 589-7005 for a free estimate from OC Restoration Co in Corona.
- Expect a professional assessment before any work begins. A legitimate restoration company will inspect, measure, and provide a written scope of work before they start billing. If someone shows up and wants to start cutting without an assessment, that’s a red flag.
- Ask for documentation. A professional team should produce moisture readings, thermal imaging, and a drying plan as part of their initial assessment. You should see these documents, not just hear about them.
- Keep the team’s documentation for your records. Even if your insurance claim goes smoothly, the documentation packet becomes part of your property’s history. If you sell the home or experience a recurrence, that paperwork matters.
Common Mistakes to Avoid
- Waiting longer than 48 hours to start drying. In Corona’s summer heat, mold colonization begins faster than the standard 48-hour window. Starting drying late means either more demolition or a higher mold remediation bill.
- Using a regular household vacuum on Category 2 or 3 water. A standard vacuum isn’t designed for contaminated water and can spread pathogens through the air. This is a health hazard, not a cleaning shortcut.
- Assuming visible dryness means actual dryness. Drywall, subflooring, and structural lumber can feel dry to the touch while still holding moisture levels high enough for mold growth. Only a moisture meter provides an accurate reading.
- Painting over water stains without addressing the moisture source. In Corona’s climate, trapped moisture behind fresh paint will eventually push through as bubbling, peeling, or mold. Covering the evidence doesn’t fix the problem.
- Disposing of damaged materials before documenting them. Insurance adjusters need to see evidence of the damage to process your claim. Tearing out wet drywall and throwing it away before photos are taken can weaken your claim position.
- Using bleach to kill mold on porous surfaces. Bleach is effective on non-porous surfaces but does not penetrate porous materials where mold roots live. It also adds moisture to the environment, which supports regrowth.
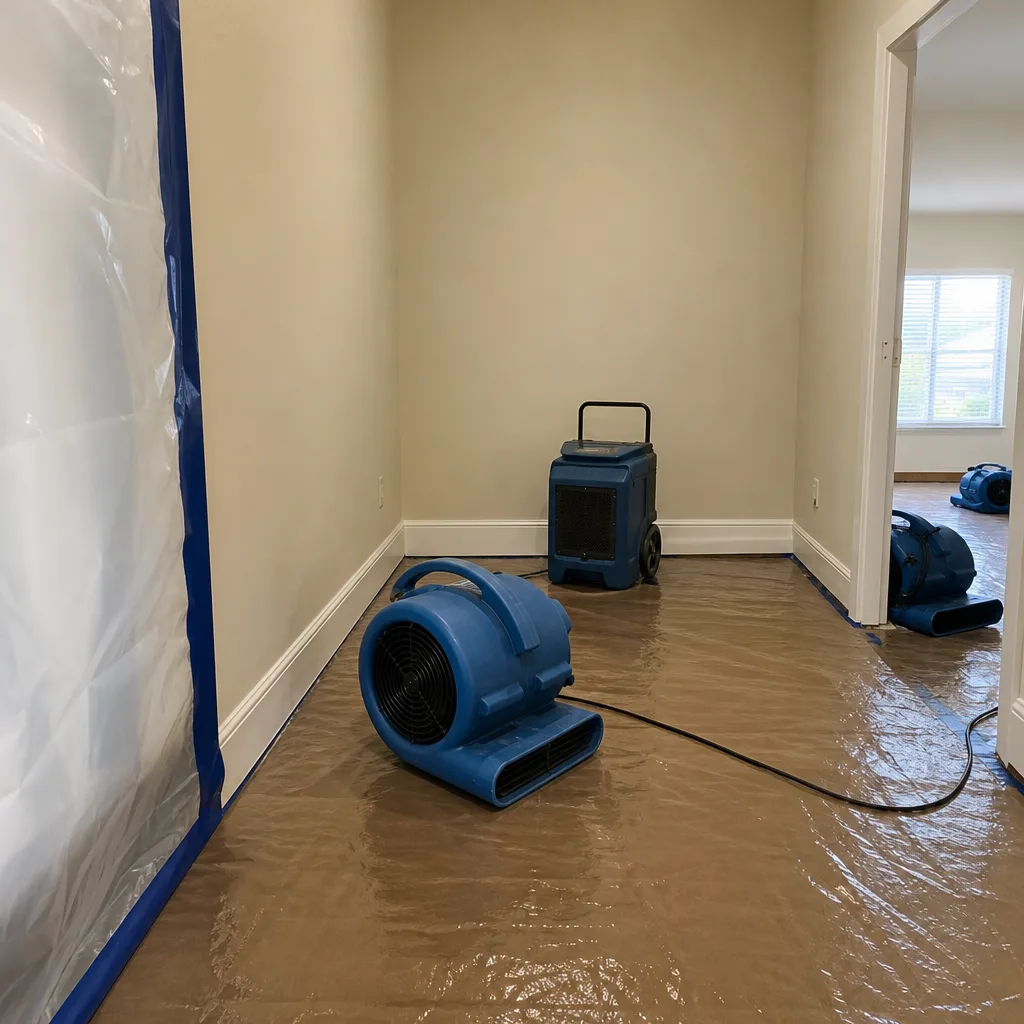
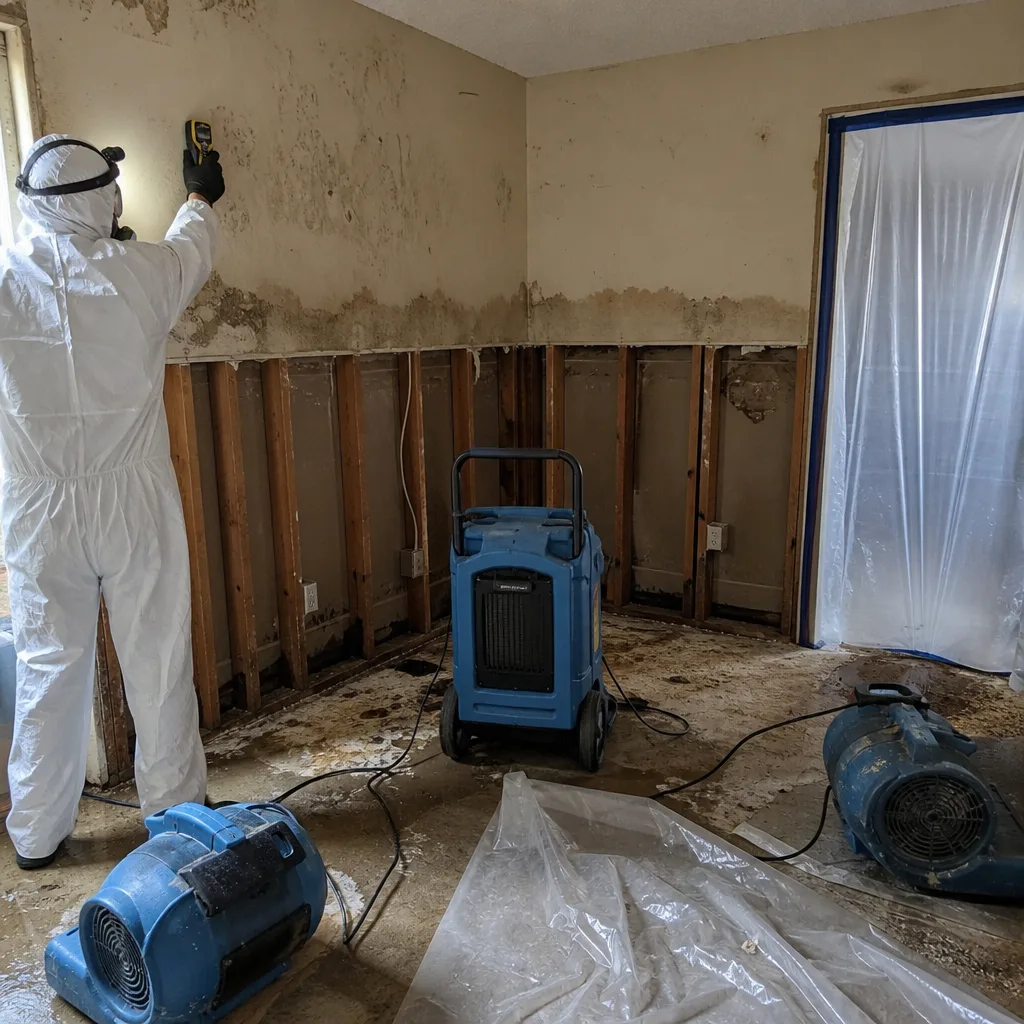
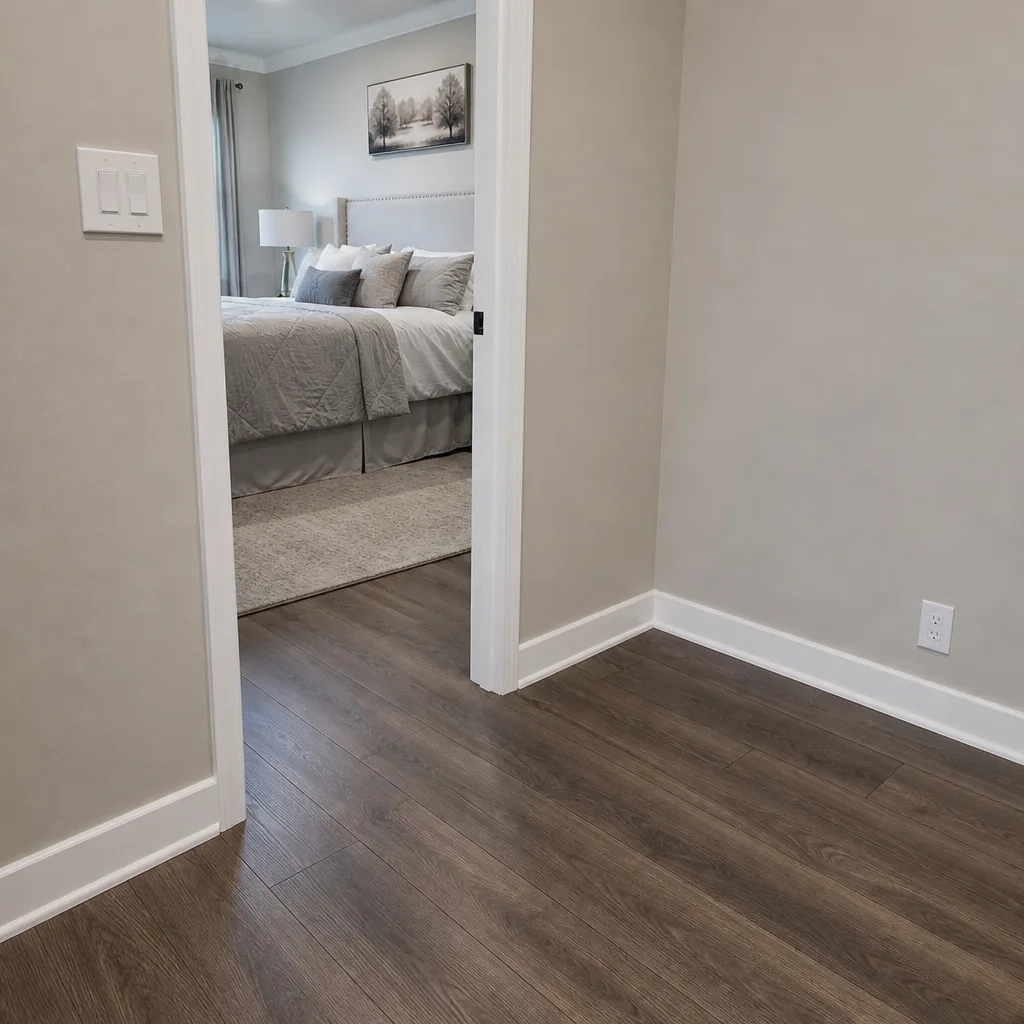
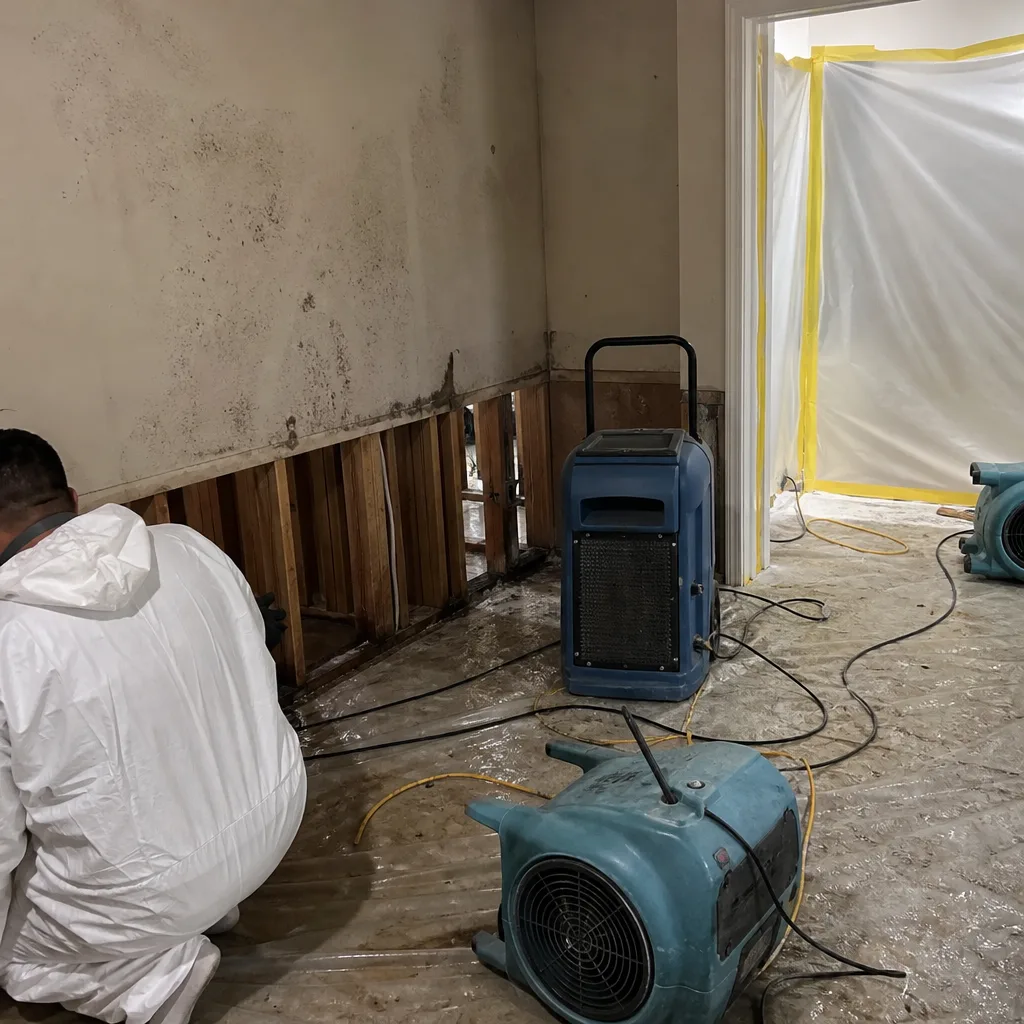
See the difference
 Before
 After
 Before
 After
 Before
 After
When to Call a Professional
Call a professional restoration company when the water is anything other than clean and limited, when the water has touched porous materials beyond a small area, when you smell mold or see growth exceeding 10 square feet, when fire damage has affected the structure or left pervasive smoke odor, or when you simply don’t know what you’re dealing with. In any of these situations, waiting or guessing makes the damage worse and the repair more expensive. OC Restoration Co offers free estimates in Corona. Call (833) 589-7005 to get an assessment from an IICRC-certified team. We bring commercial-grade drying equipment from Dri-Eaz, Phoenix, and XPOWER, and we document everything your insurance company will need.
Frequently Asked Questions
You can handle small, clean-water spills under about 10 square feet on non-porous surfaces using a wet/dry vacuum, fans, and a household dehumidifier, provided you verify dryness with a moisture meter and complete drying within 48 hours. Anything beyond that scope, especially water in walls, ceilings, or subfloors, requires professional equipment and documentation. If you’re unsure, call (833) 589-7005 for guidance from OC Restoration Co, serving Corona with free estimates and no-obligation assessments.
Insurance companies routinely ask for documentation proving that drying was completed to industry standard, and a DIY effort typically cannot produce moisture logs, thermal imaging reports, or equipment records that adjusters require. The best approach is to handle only immediate, visible mitigation while contacting an IICRC-certified restoration company to handle the documented drying process. This protects both your property and your claim position.
Professional water damage restoration in Corona typically ranges from $1,500 to $4,000 for a moderate Category 1 water intrusion affecting one room with no structural replacement needed. Category 2 or 3 water damage involving contaminated water, wall cavity drying, or material removal and replacement typically ranges from $4,000 to $12,000 or more depending on the scope. The exact cost depends on the affected square footage, the category of water, the number of affected materials, and what can be dried versus what must be replaced. Call (833) 589-7005 for a free estimate from OC Restoration Co in Corona.
Most professional restoration companies, including OC Restoration Co, prioritize water damage calls and can typically dispatch a team to Corona homes within a few hours of the initial call, depending on current call volume and the severity of the situation. When you call, describe the damage clearly and ask for an estimated arrival window. Our approach is to provide honest expectations so you can plan accordingly.
Mold remediation on porous surfaces cannot be effectively performed with bleach, because bleach does not penetrate the material where mold roots live and it adds moisture that supports regrowth. The EPA recommends professional remediation for any mold growth exceeding 10 square feet, and in Corona’s climate, even smaller patches should be professionally assessed if they’re associated with an ongoing moisture source. For expert mold assessment and remediation in Corona, call (833) 589-7005 to speak with the certified team at OC Restoration Co.
Restoration companies hold certifications from organizations like the IICRC that define specific standards for water extraction, structural drying, and mold remediation, and they operate commercial-grade equipment designed for these precise tasks. General contractors are skilled at building and remodeling but typically lack the specialized drying equipment and documentation processes that insurance claims require. For water, mold, or fire damage in a Corona home, a restoration company with IICRC certification and professional-grade equipment from brands like Dri-Eaz and Phoenix is the appropriate choice.
The Bottom Line
The DIY-versus-professional decision in damage restoration comes down to a simple but unglamorous question: can you document what you did? For small, clean, surface-level problems, the answer is yes, and there’s no shame in saving the money. For everything else, the documentation gap, the equipment gap, and the legal gap all point in the same direction. In Corona, where the summer heat compresses your mold window and stucco hides water where you can’t see it, the margin for error is thinner than in most places. Call a certified professional, get the assessment, and let the documentation protect you. For more guides & resources, explore our blog. That’s why we exist.
Written by the team at OC Restoration Co, serving Corona since 2017.